Scenes
A scene is a single screen of your game, it can contain multiple actors and triggers. A game is typically made-up of many scenes connected together with triggers using the Change Scene event.
Adding a Scene
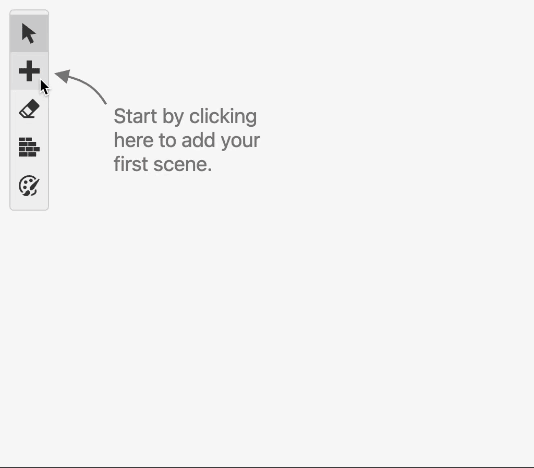
Click the + button in the Editor Tools and select Scene from the menu. Click on any empty space in the Project Viewport to place the new scene.
You can use the Editor Sidebar to give your scene a name and a background from your project's assets. See the documentation for Backgrounds for more information on adding background images.
Scene Properties
- Name - Names your scene. Useful for locating your scene with the search bar and scene navigator.
Using / characters in your scene's name will cause it to appear within folders in the scene navigator (e.g. ui/title screen will appear as title screen within the ui folder)
-
Type - Lets you choose from the list of game modes such as Top Down 2D or Platformer. This option changes how the scene plays while in game. Using plugins it's possible to add additional scene types here and modify the inbuilt types.
Some types, when selected, will show a
 button allowing you quick access to the scene type's Settings.
 -
Background - Lets you choose a background image from the
assets/backgroundsfolder. Optionally allows extracting the color palettes automatically for color .png images. -
Monochome Palettes - The background palette (BGP) and two sprite palettes (OBP0 and OBP1) which are used when running a game without color.
-
Background Palettes (Color Modes Only) - The eight palettes that will be used when coloring the scene.
-
Sprite Palettes (Color Modes Only) - The eight palettes that will be used for sprites in your scene.
-
Player Sprite Sheet - Used to set a custom player sprite for this scene. By default the scene will use the default player sprite for the selected scene type.
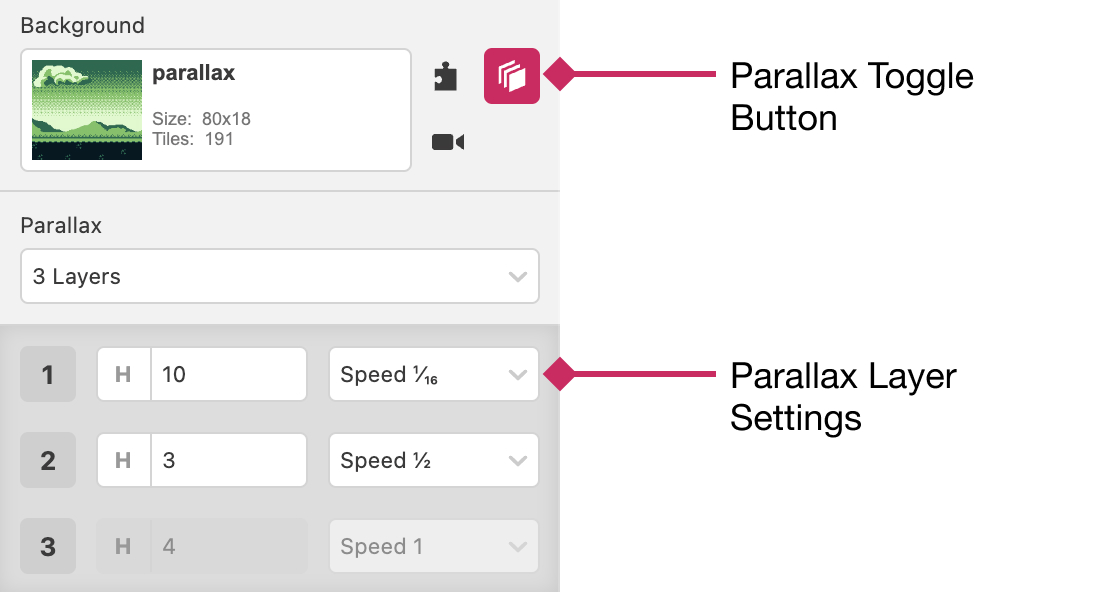
Parallax Mode
When a scene is wider than 20 tiles (160px), parallax mode becomes available. You can enable it by clicking the ![]() button to the right of the Background Selector.
button to the right of the Background Selector.
When parallax mode is enabled you can split the background into up to three slices which can be modified to scroll at different speeds as the camera moves in game.
Camera Bounds
When a scene is wider than 20 tiles (160px) or taller than 18 tiles (144px), the ability to limit the camera bounds of a scene becomes available. You can enable it by clicking the ![]() button to the right of the Background Selector.
button to the right of the Background Selector.
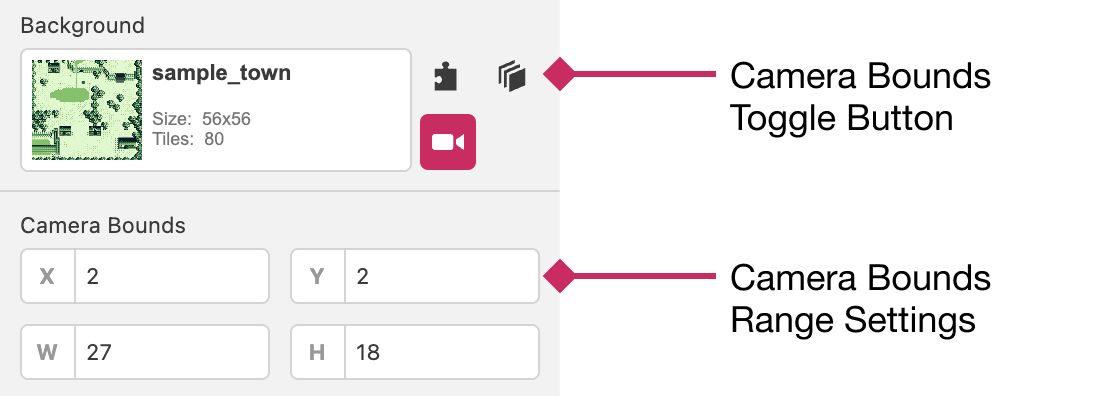
When enabled this lets you set the minimum and maximum area that will be viewable by the camera in your scene. It's also possible to set these values dynamically using a Set Camera Bounds event.
Common Tilesets
This is an advanced technique that may require an understanding of how graphics memory is located and loaded in your game.
When using the Change Scene event with Fade Speed set to Instant you'll often see "glitchy" graphics as you move to the next scene. This is because there is slight delay loading tile data and for a small period of time the scene will show the previous scene's tile data using the new scene's layout. To confirm this you can use the VRAM panel in the Debugger.
To help fix this problem you can specify a tileset that is shared between the two scenes. Tilesets are images from the assets/tilesets folder. When two scenes share a common tileset, the common tiles will always be loaded in the same locations in memory allowing more seamless transitions.
e.g. these two scenes have the same common tileset
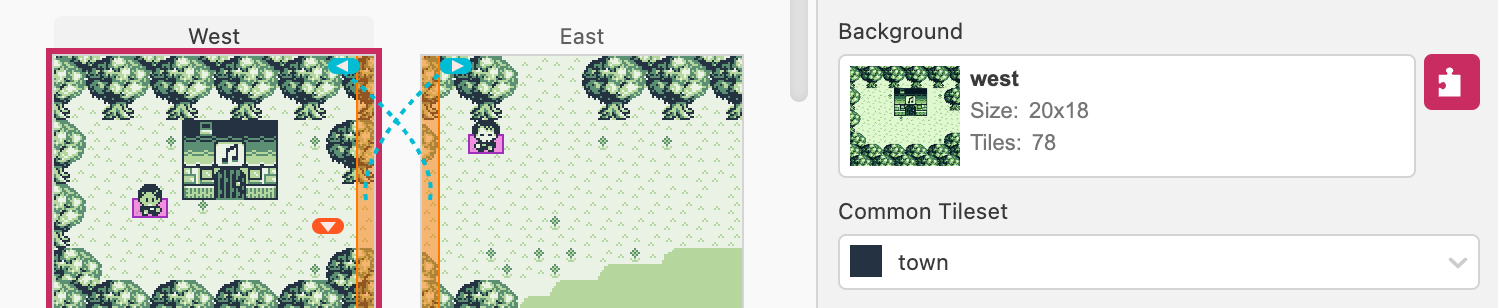
which allows instantly switching between them
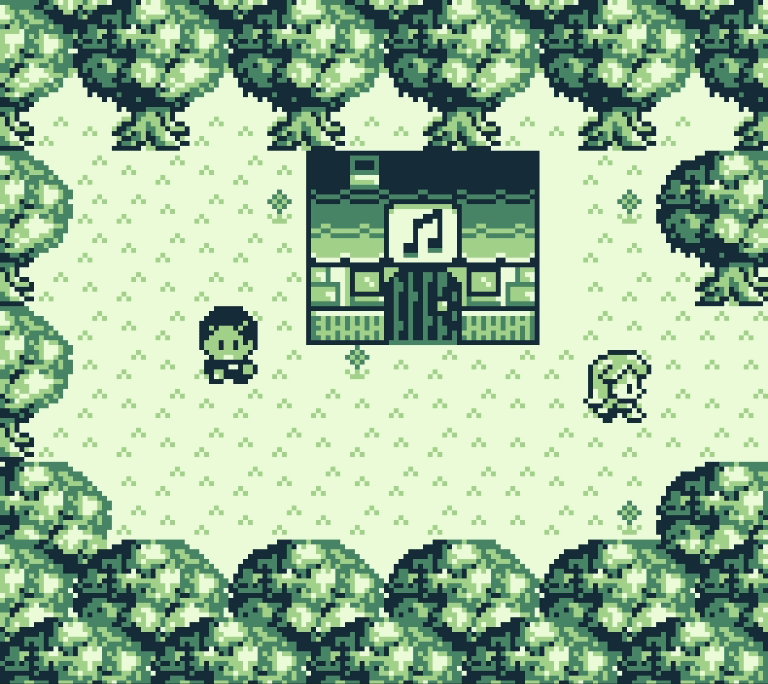
The assets used in this example are:
Notice how the tileset image doesn't need to only contain unique tiles (although it can if you'd prefer), when running your game only the unique tiles found in the image will be loaded.
Scripting
Scenes can contain an On Init script that will be called as soon as the scene is loaded in game. You can use this to do things like playing music as the scene loads, configuring events to happen on button presses, initialise actors based on the values of variables, and much more.
You can also define scripts to call when the player collides with Actors that have a Collision Group set by clicking the On Hit tab and choose a collision group.
To start building a script, select a scene, click the script type you want to edit and click the Add Event button in the Editor Sidebar to open the event menu. Select an event to add it to the script.
For more information see the documentation for Scripting.